Before We Start
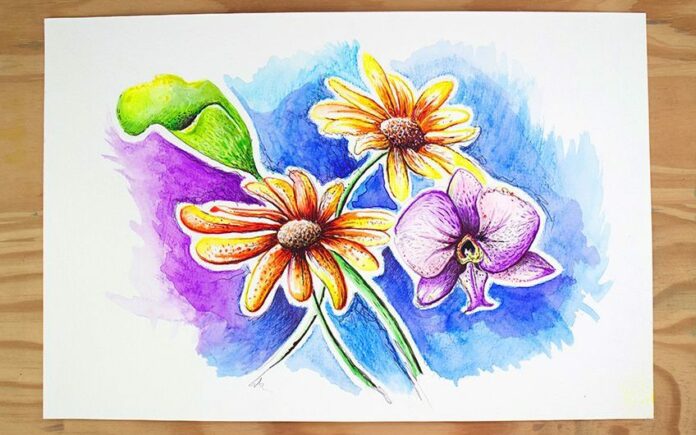
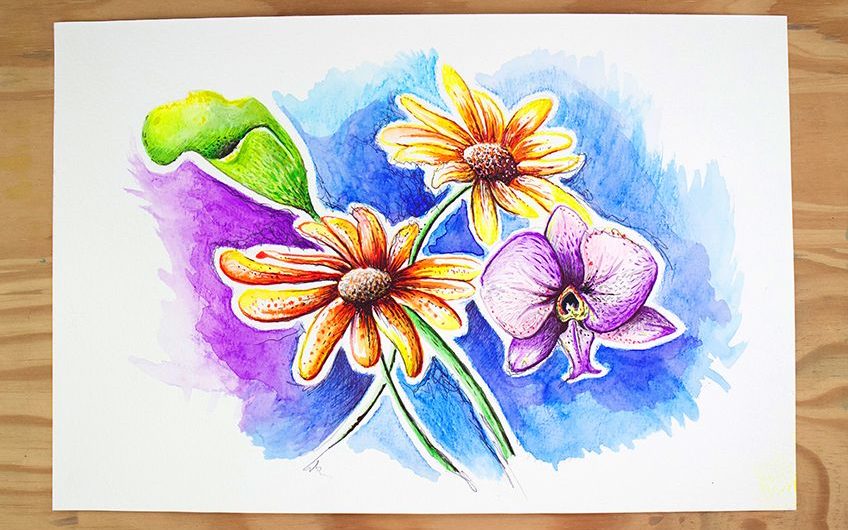
This tutorial intends to explore various techniques of watercolor pencil art. We will look at various methods for using thistype of pencils through a drawing of easy watercolor flowers. Using watercolor pencils to draw watercolor flowers requires a more relaxed approach. Try to make sure you have time and a comfortable environment when doing this tutorial. We will be going through several techniques and then applying them to a watercolor flower painting and drawing.
Learning how to use watercolor pencils is not just a process of drawing flowers, but it is also a process of painting watercolor flowers. We will be learning how to paint watercolor flowers with our watercolor pencils as well as learning a variety of techniques throughout the process.
Necessary Materials
Having the correct material for learning how to paint watercolor flowers with watercolor pencils is essential to the best results. When learning how to paint flowers with watercolor pencils as a beginner means that we do not need the top range materials, however, we do need the correct materials. Below is a list of a few suggested items that you can purchase online. Here is what you will need:
- Paintbrushes
- 300 GSM paper
- Arteza Watercolor pencils
- Ruler
- Scotch/Masking tape
- HB pencil
- Sharpener
Preparation
What we want to do is make sure we have a flat surface and good lighting for this tutorial. It is helpful to always be in a quiet space, so perhaps try to place yourself somewhere where you may not be distracted. We want to make sure we have a jar of water nearby as it will be essential for this tutorial.
Lastly, We will be drawing a series of different flowers from a source image that you can either print or draw directly from your smart device.
A Step-by-Step Guide on How to Draw Flowers with Watercolor Pencils
Learning how to paint flowers with watercolor pencils is a great task for learning how to use watercolor pencils in general. The process is quite simple, whereby we will make some loose sketches of a variety of flowers. We then follow up that process with the painting of the flowers. Flowers allow us a great deal of freedom with our mark-making because of their abstract nature. This means we can be quite playful with the marks we make with our pencils when creating flowers in watercolor pencils. However, we will find that there are a variety of ways that we can both draw and paint with watercolor pencils. With that said, let us get started.
Step 1: Sketching Our Image
All watercolor pencil drawings begin with a pencil sketch. What we want to do is look closely at our source images and notice the various flowers that we want to use. In this tutorial, we will be drawing/painting a combination of daisies, orchids, and lilies.
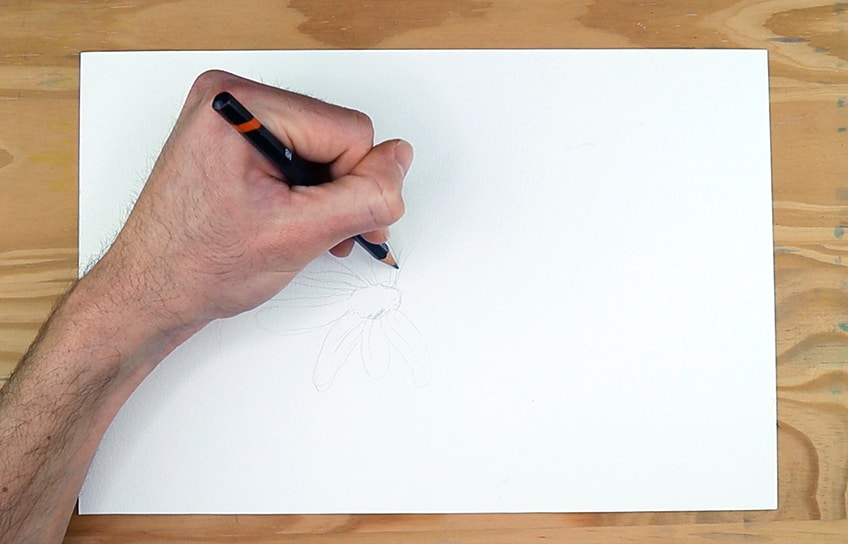
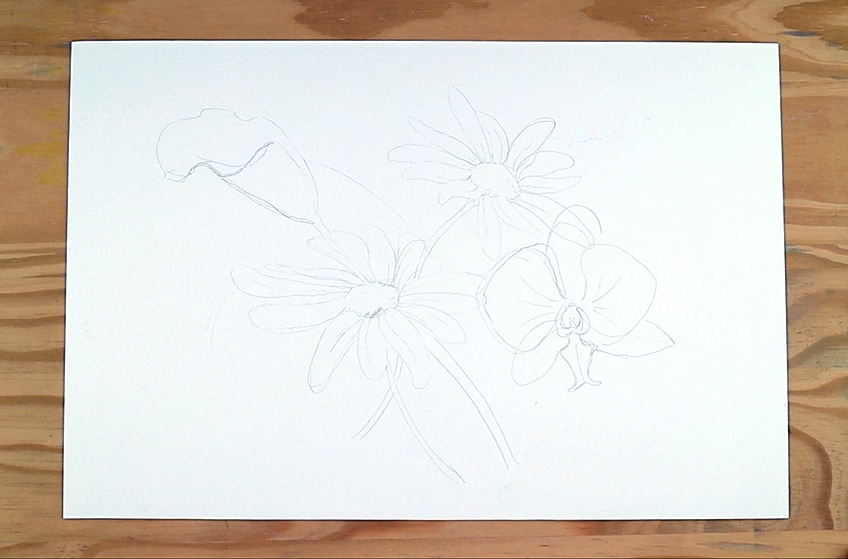
Because watercolor pencils are not the same as normal pencils, we want to apply the same process of watercolor painting to our drawing. By this what is meant is that we will build up the image by various grounds, starting with the background.
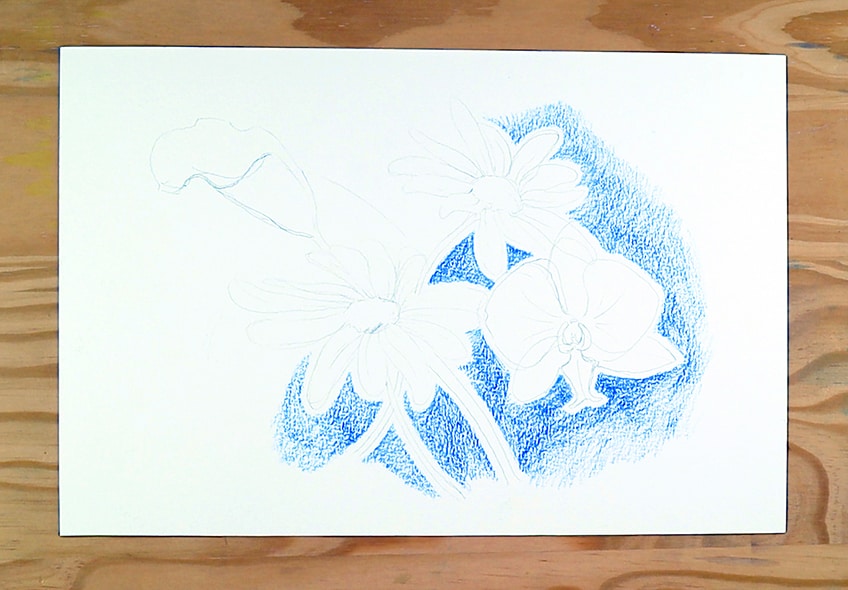
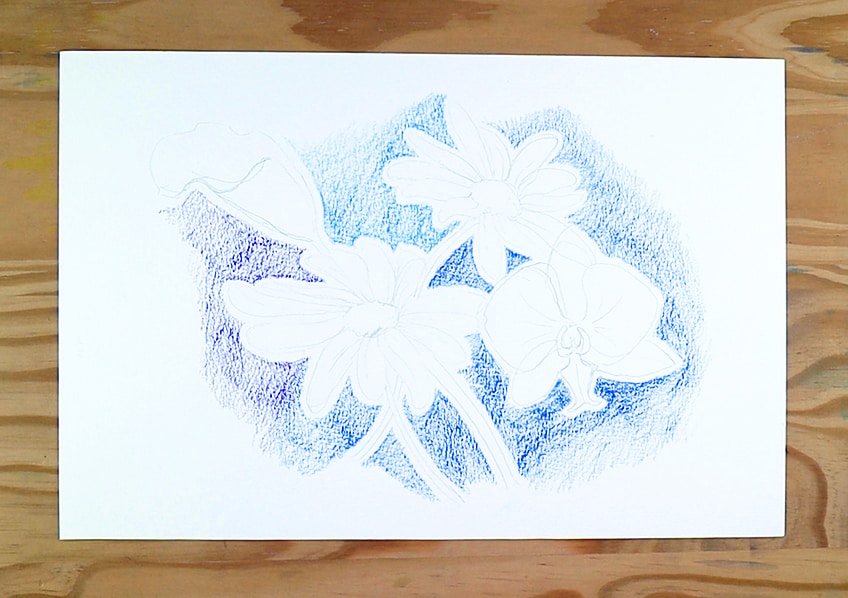
Leaving a little space between our sketch and the watercolor pencil will create a nice pop towards the end of the tutorial, allowing the flowers to have a beautiful contrast to that of the background. With your purple pencil begin to color the background around the pencil sketch, creating an interesting color combination in the background.
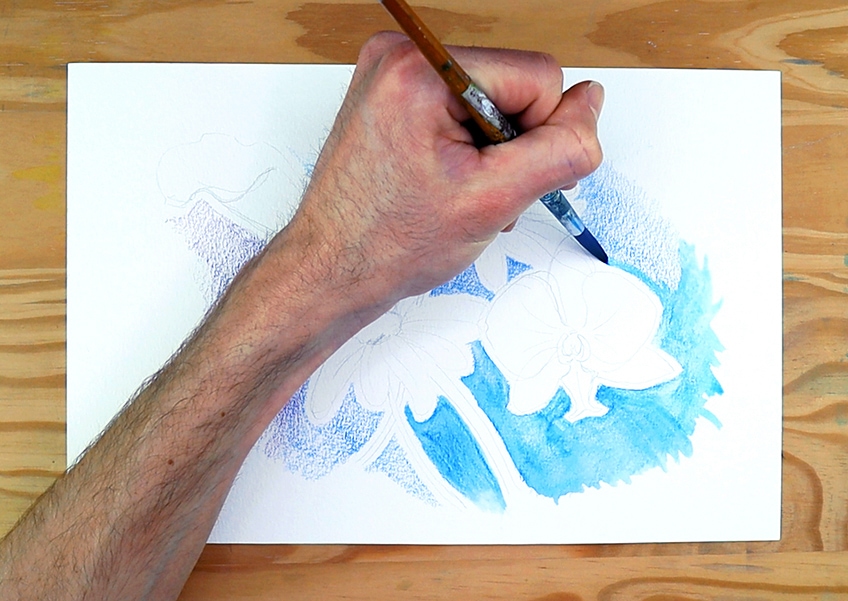
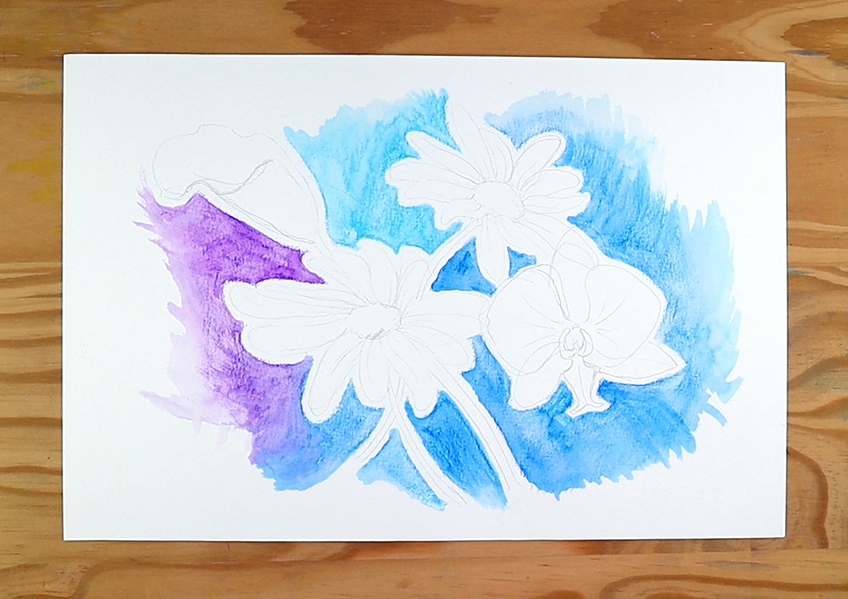
Once we have done that, allow it to dry for 10 minutes or so.
Step 3: Drawing and Painting The Orchid
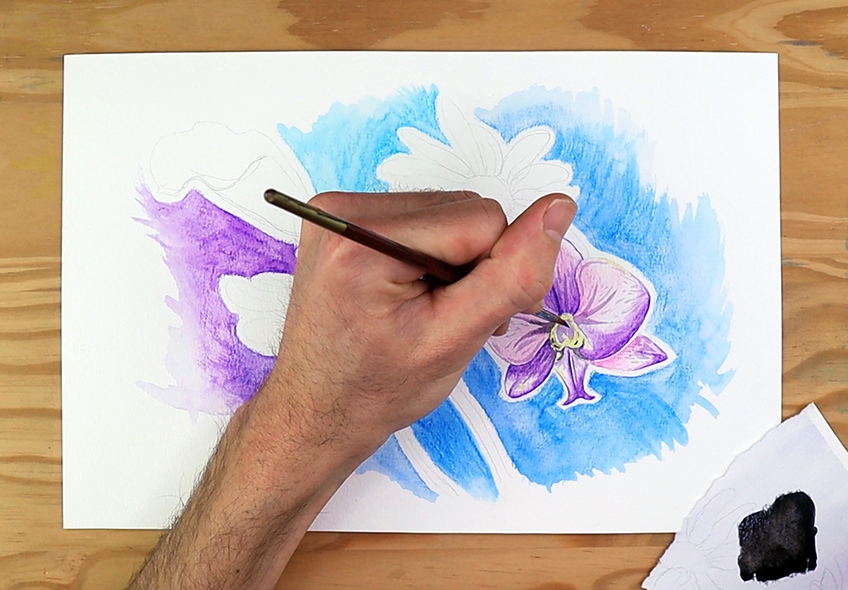
Since we have four flowers, let us begin with one at a time, starting with the orchid. Orchids are very interesting flowers, in some ways their shape can make them seem creature-like. Let’s start with coloring in the petals by using pink for the larger surface area and purple for the edges.
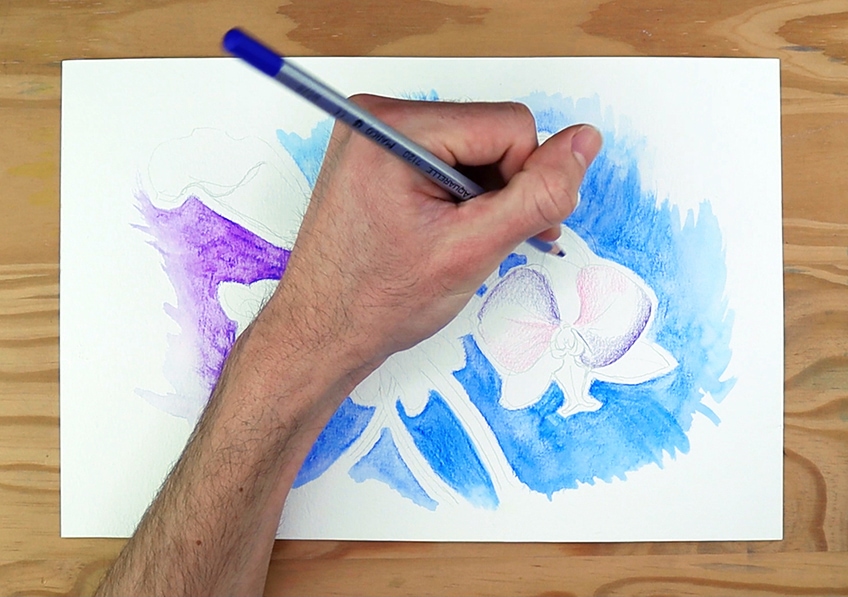
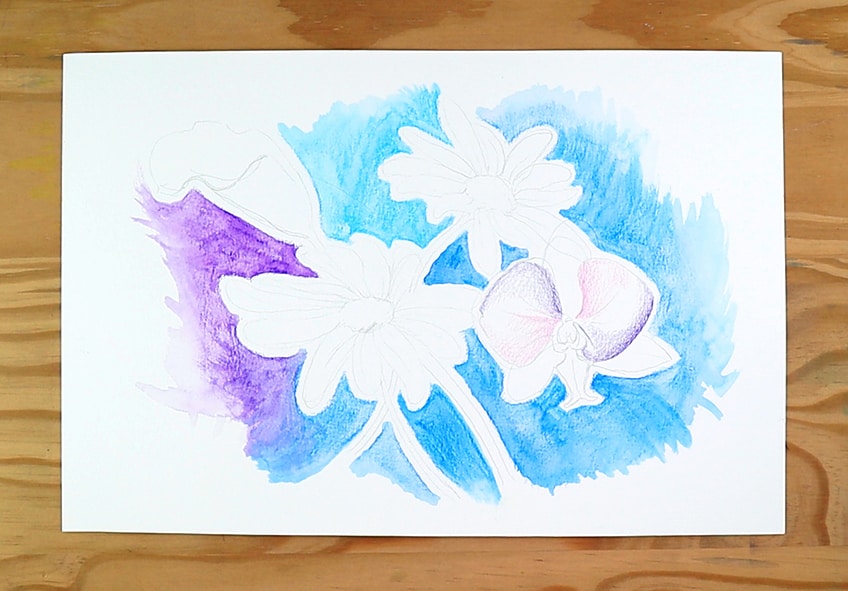
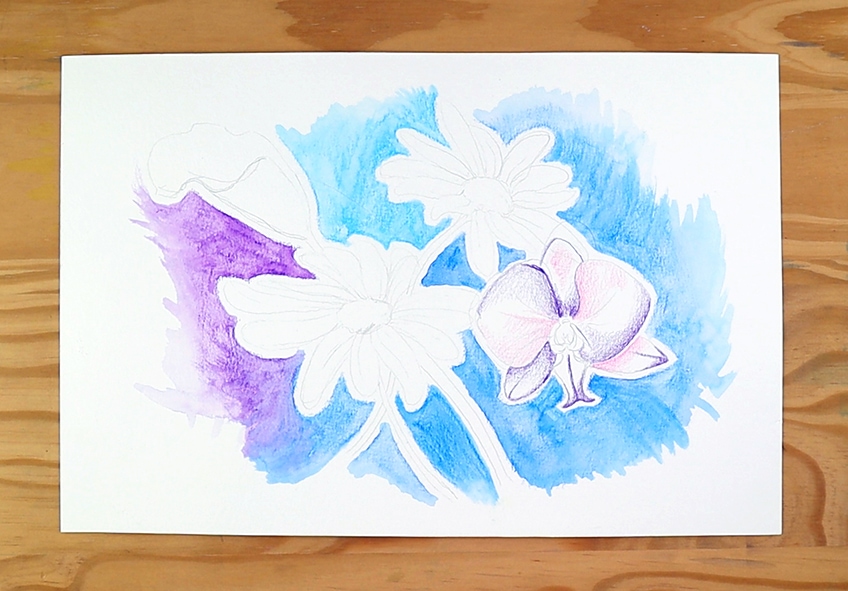
Once we have colored in our flower we can begin activating the colors with water. What we want to do is slowly begin to paint over our colors with a small watered brush. Slowly and steadily we will paint over the colors and begin making strokes from one into the other. Once that has dried we can begin to layer new marks on our flower, giving it various features. Another great technique we can use to make new marks is the palette technique. What we do is make a little scribble of watercolor pencil on a scrap piece of paper and then activate it with a watered brush.
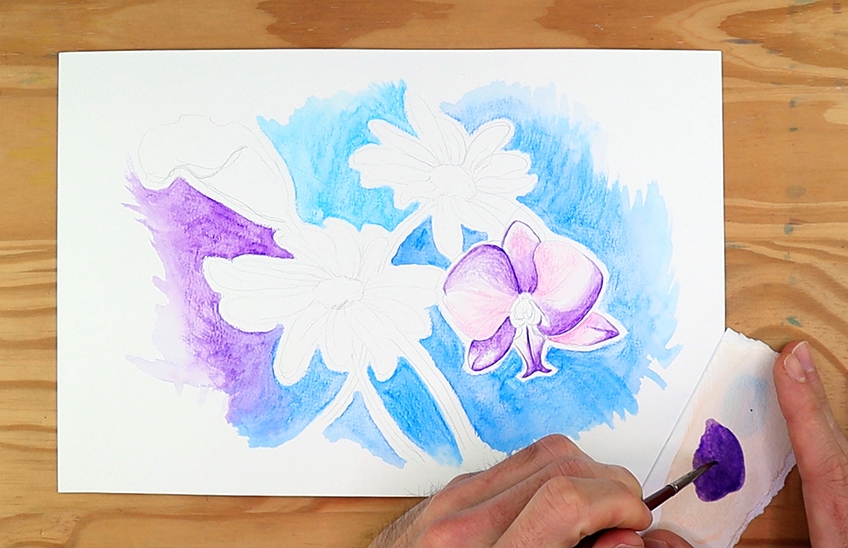
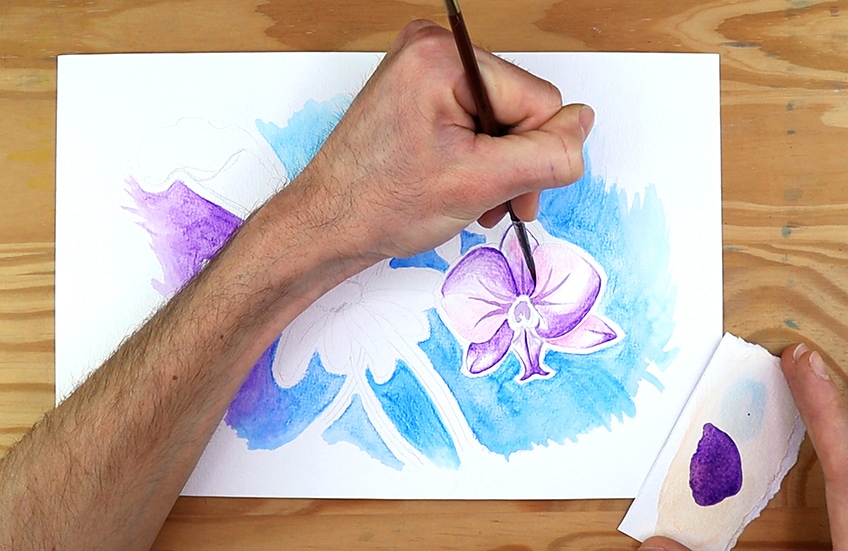
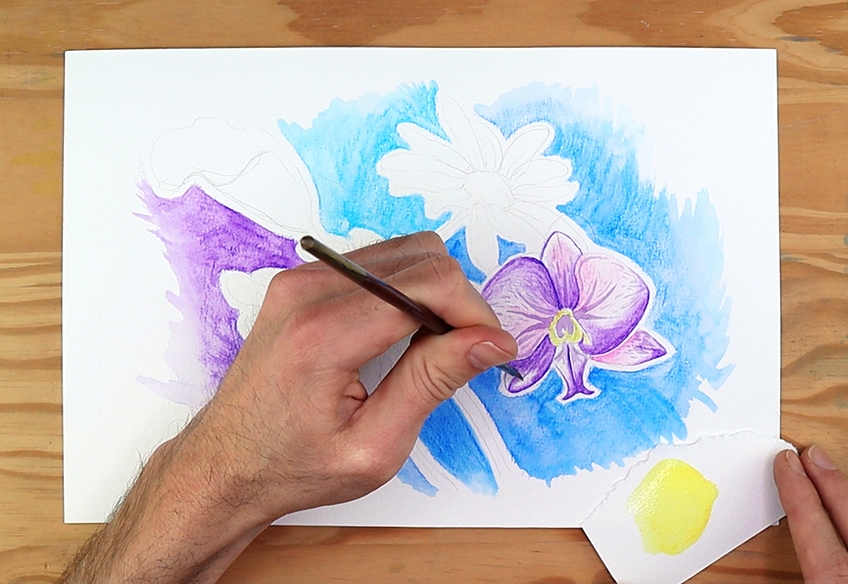
Once you have allowed your last application of watercolor pencil to dry, a good suggestion is to then make some stark contrast by using black as a way to define moments in the flower. With the same palette technique, water the black color and begin to paint some darker details. This can be done along the edges of the petals, it could be various lines in the bud or center of the flower, as well as various little lines or dots to give your flower a unique look. We can also do this with other darker colors such as purple or dark blue.
Step 4: Drawing and Painting the Daisy
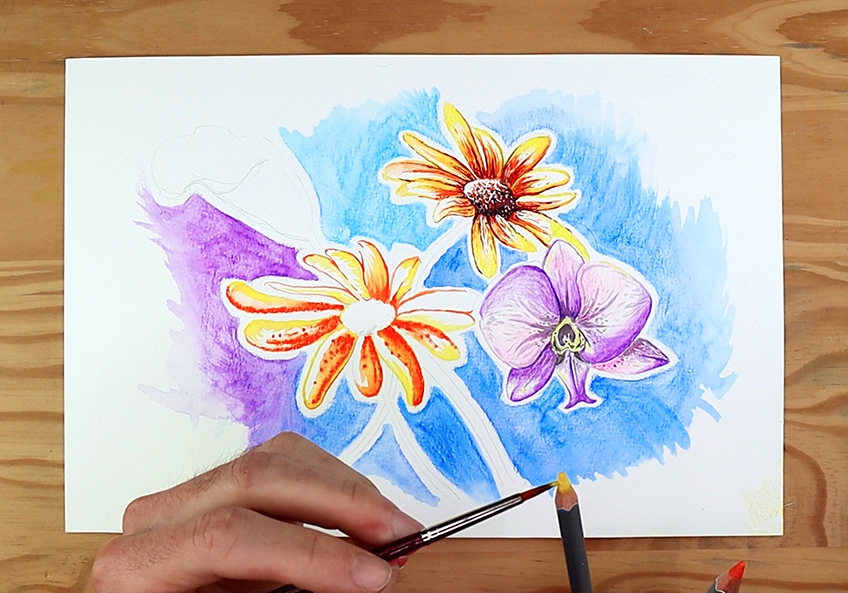
As we move on to a new flower let us begin with a new color and the classic watercolor pencil technique. We can begin by coloring in the petals yellow, However, try to not color in the whole petal but rather leave some negative space. Perhaps color on one side of each of the petals. Carry on this process until you have colored in all the petals. Another good suggestion is to color the base of the petals where they are connected to the center of the flower. What we will be exploring is the mixing technique whereby we draw colors onto each other before activating them with water.
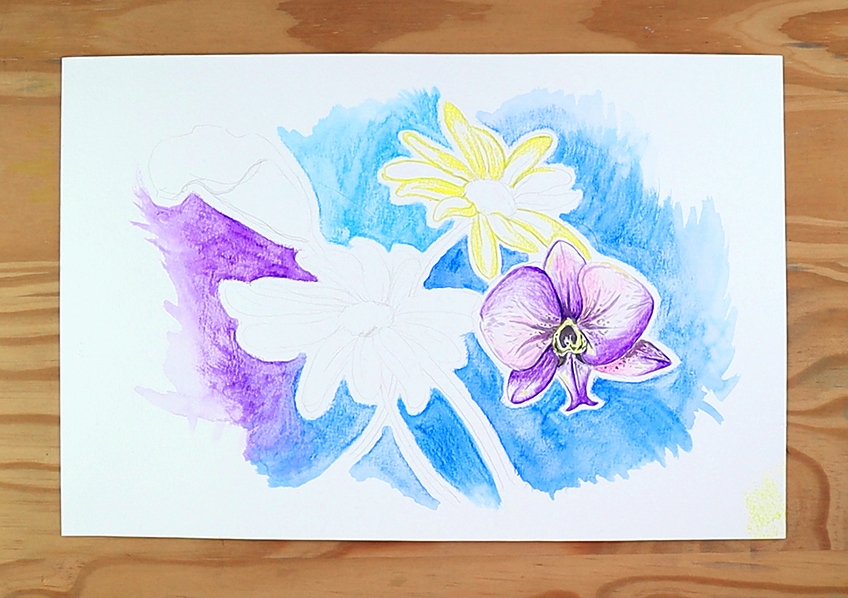
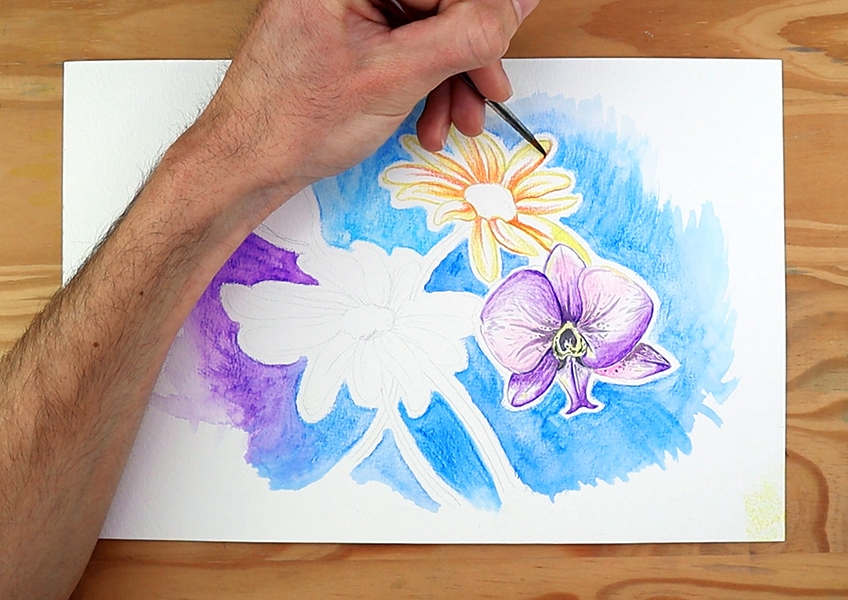
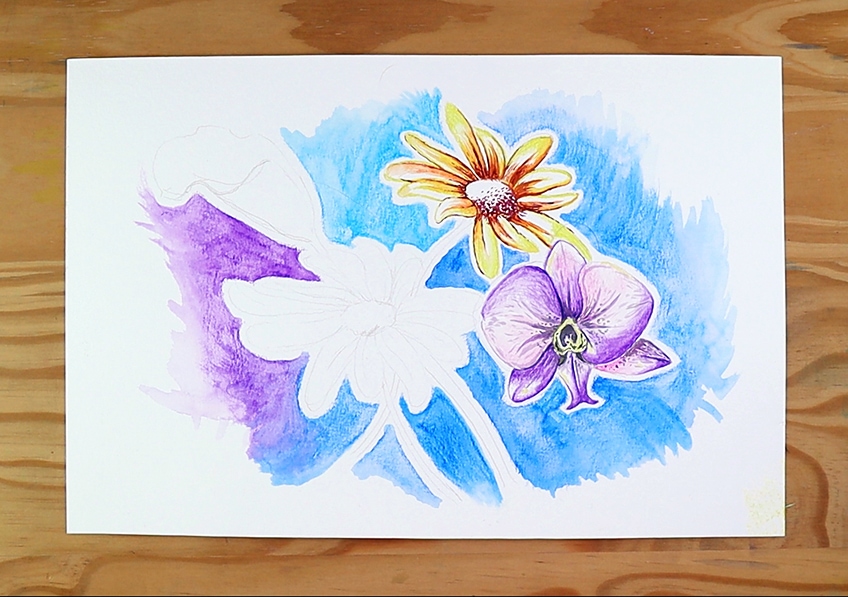
Again, since we want to make our details resemble the quality of a flower, consider where you paint these darker marks. Perhaps keep the dark moment near the base of each petal. Try to not wet your brush too much before pulling paint directly off the pencil. As you dip your brush in water, give it a little dab on some material to take some water away. Keep using this technique to create interesting marks in the flower.
It’s good to try various ways of applying colors in a watercolor pencil drawing, this way we learn various ways of making marks in an artwork. Try to attend to all the petals until you feel satisfied.
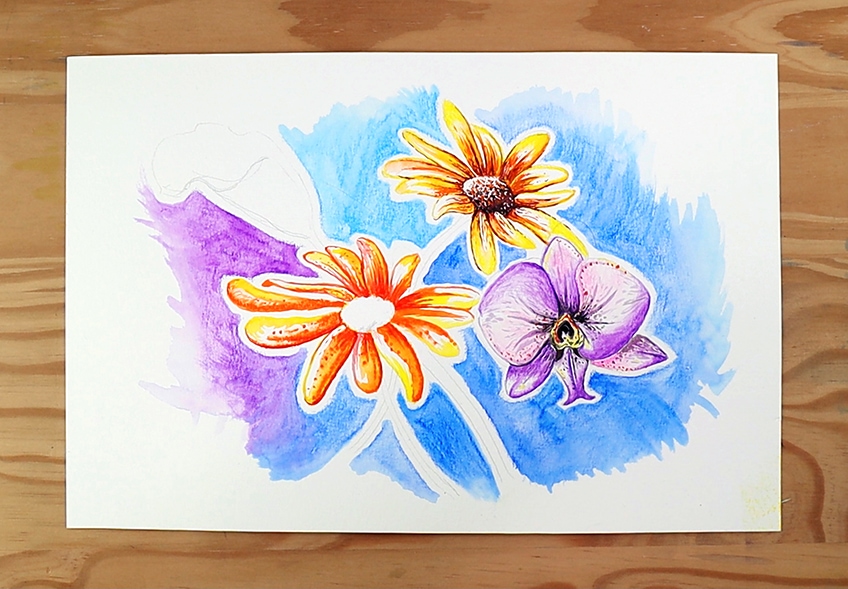
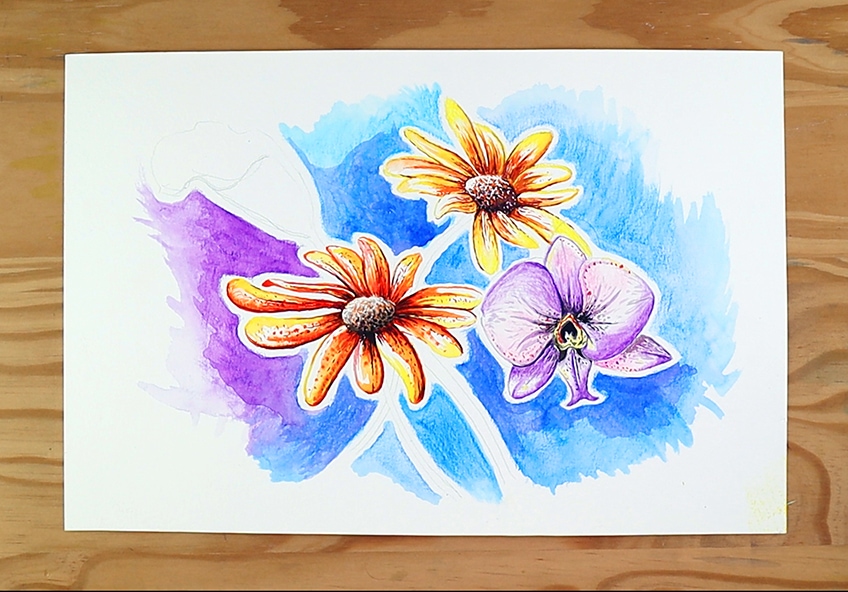
Once we have allowed the petals to dry, with the same technique, let us paint the center of the daisy with our brown pencil. Remember that the center of a flower is never flat and generally consists of little buds of pollen, so perhaps use a stippling process of applying your pencil marks. Once that has dried We can then add new darker tones on our flower with the same technique. Perhaps use black to create good contrast on the center of the flower. Try to put more color on one side of the center part of the flower to give the effect shadow.
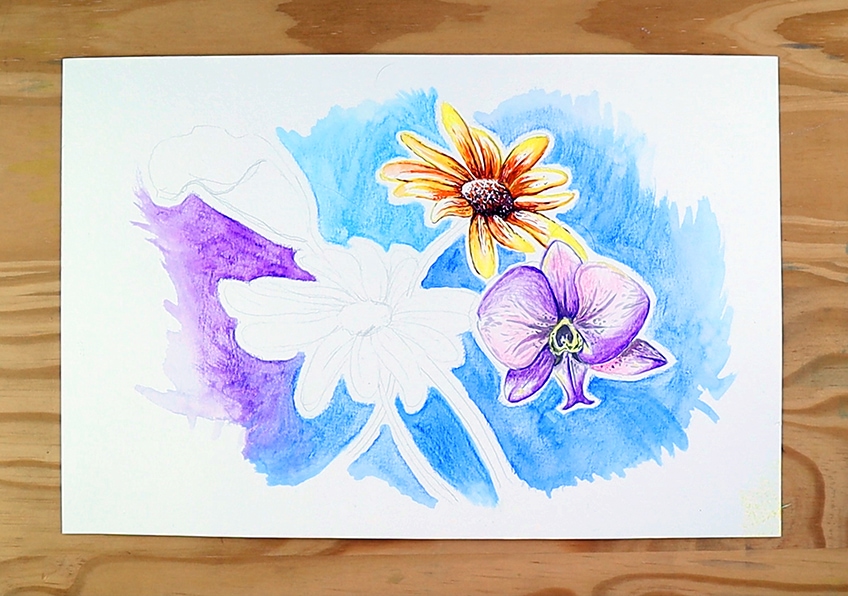
Try to be subtle with some of your marks. We want to be subtle with mediums that are applied with painterly motions as they can be way too much if not attended to with caution and a steady hand. This is a general rule to work around as you go.
Step 5: Drawing and Painting Our Second Daisy
Let us begin to explore some new techniques whilst working with some that we have now familiarised ourselves with. Perhaps do some more classical coloring techniques on some of the petals. However, on some of the other petals, we can now try a new technique where we apply water onto the page which we will then color over with our watercolor pencil.
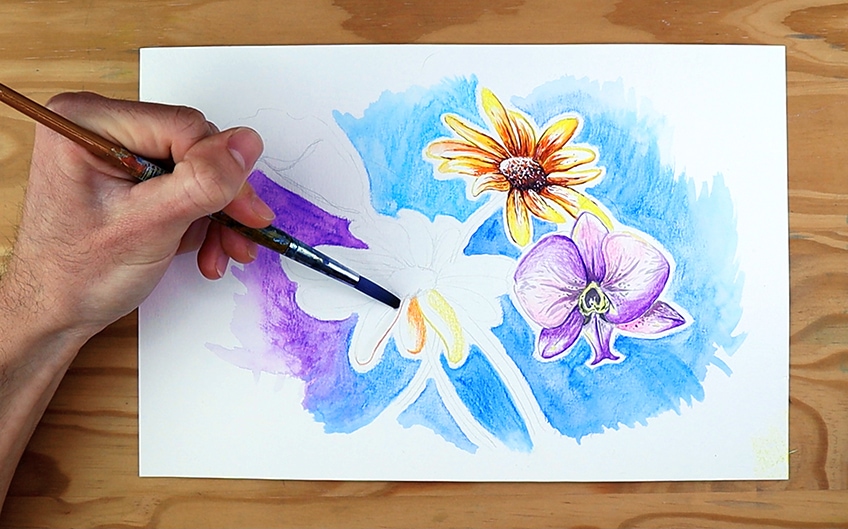
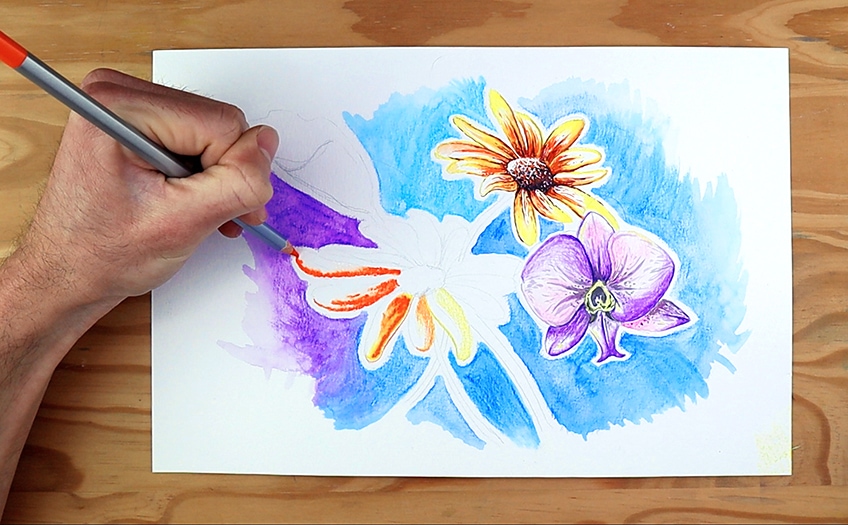
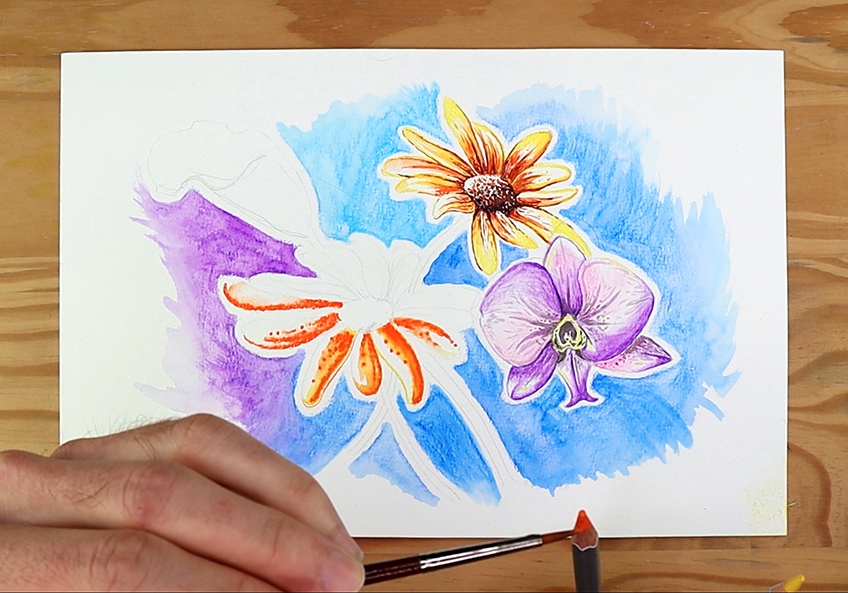
Once these marks are completely dry we can now start trying some of the other techniques we know to add more details and effects in the flower. Perhaps, let us add some lighter tones with the same technique whereby we use the pencil directly for extracting color.
Step 6: Drawing and Painting The Lily
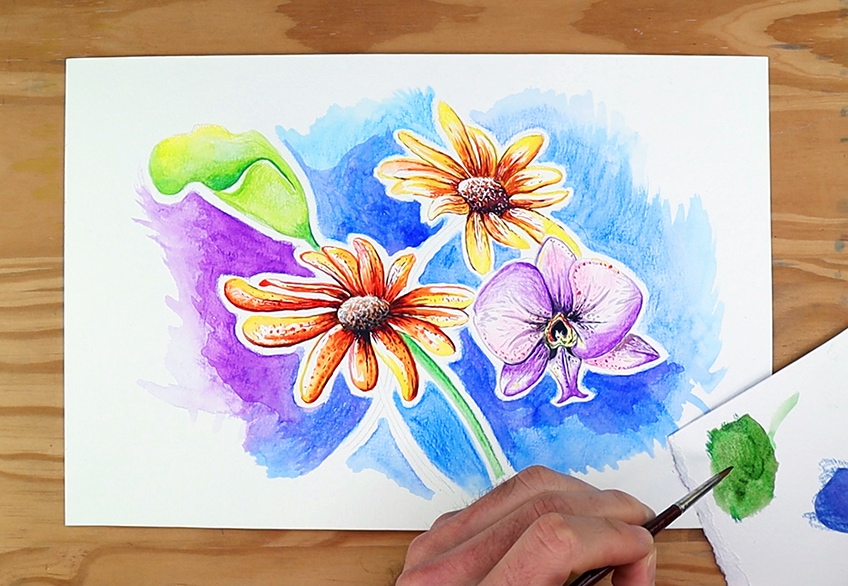
Let us move onto our last flower by using the merging technique, where we apply colors in close vicinity to one another which will then be integrated by the use of water. Let’s start by coloring our lily with two colors, perhaps green and yellow. We can then proceed to activate these colors with our paintbrushes and water by painting water directly over our pencil marks. We can also move the color around the flower which means you don’t need to always completely color in an area. The water will move the color around as you make paint strokes.
Again, let us use the variety of techniques learned until this point. For instance let us try the palette technique, whereby we scribble some color onto a scrap piece of paper and then mix it with water and a paintbrush to make a sort of paint that we can then use on our flower.
We can also use the technique where we pull paint directly from the pencil with a watered paintbrush to create darker tones in the center of our Lilly. We can also add in the colors for the stems of the flowers. Perhaps, use green, and once that has dried apply black along the edge to give it some definition.
Step 7: Pen Work and Final Touch-Ups
Some techniques within watercolor pencil and paint are not always the medium itself. For one, Once your drawing has completely dried, a great technique to apply to your drawing/painting is using a pen to create interesting moments. In this case. perhaps try to do some scribbling effects around and over your drawing to enhance certain areas. These pen marks can create a very abstract quality in the work if that is your intention.
Or you can be more clinical about drawing some details with your pen, to create more realistic moments and more tones that resemble the qualities of real flowers.
Lastly, you can always use some of the techniques to enhance the contrast of your background or to add some final details in the flowers. Some good suggestions are to revisit your flowers and see if you can add new interesting marks or apply some darker tones of the same color in your background to create more contrast. There you have it, a tutorial on how to draw/paint interesting flowers with watercolor pencils. Remember, there is no right or wrong way of how you use these pencils. However, there is a pearl of general wisdom associated with what kind of effect you want to achieve and how to do it with what kinds of techniques are available to you.
Tips to Remember
This watercolor pencil tutorial shows you various watercolor pencil drawing/painting techniques as well as an easy watercolor painting that you can use as a template for your own. Using watercolor pencil can be accompanied by various mediums that may help refine the artwork. Sometimes a way of doing an artwork should not be done exclusively with just a single medium. As you do your watercolor art, always remember to have fun!
- In this watercolor pencils tutorial, the aim is to free you from a singular way of using the medium. So always try to use a medium in more than one way.
- When using a watercolor pencil give your water a refill with clean water now and then.
- Watercolor pencil art is not always just watercolor pencils. Drawing on top of our paintings can enhance the work sometimes.
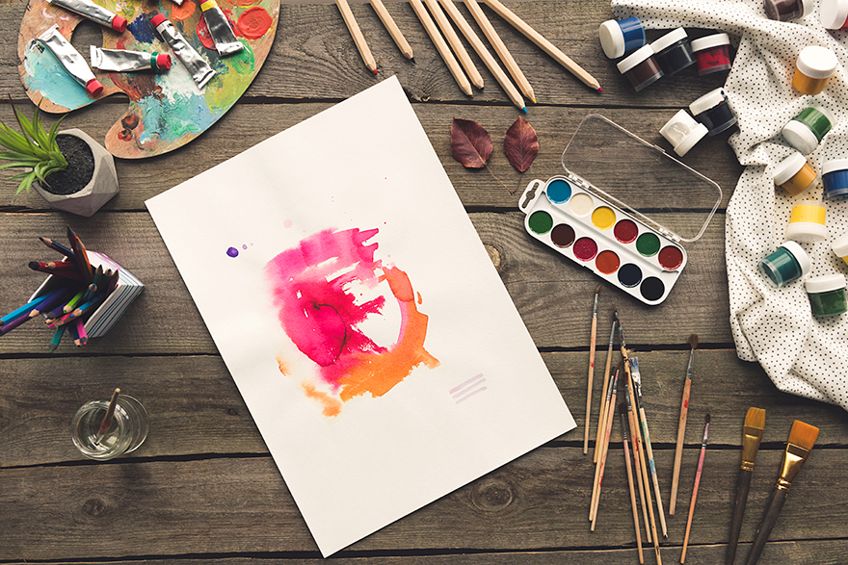
- Watercolor pencil drawing can come with inevitable mistakes. SO keep a paper towel on hand. If you want to redo a mark, wet the area and give it a dab with a paper towel.
- Doing a watercolor flower painting with watercolor pencils comes with the freedom to explore. Try using both drawing and painting approaches.
- This watercolor flower tutorial is about focusing on the various ways to use your pencils for both drawing and painterly effects. So feel free to try various techniques as you go through the tutorial.
There you have it! A tutorial on a few watercolor pencil tips and techniques to help you strengthen your watercolor pencil skills. Watercolor pencil art is a great way to create a watercolor flower painting. When learning how to use watercolor pencils we must also learn how to paint with watercolor pencils. Knowing how to paint watercolor flowers with watercolor pencils is about learning the variety of approaches one can use with this medium.
How Do You Use Watercolor Pencils?
A good suggestion and a more common application are to draw directly onto the surface of a paper with your pencils and then activate the marks by painting over them with water. There is no one way to use watercolor pencils. In some instances, you can premix colors and make paint out of them and then use a brush to make painterly marks. Watercolor pencil drawings can also be made into a more painterly style with water and then once dry can be drawn over with other mediums. There are a variety of ways to use watercolor pencils, it’s all about trying to be as creative with the medium as you possibly can be.
Yes, watercolor pencils do not always need to be activated with water. What makes an interesting image, in general, is when there is a variety of marks that create a diverse range of qualities. So when you do a watercolor pencil drawing you can use water or not or do both. There is no one way to learn how to paint with watercolor pencils, the trick is to be as creative with the medium as best as possible. As you practice your watercolor art you will see that, like any medium, there is always a variety of application methods. However, when learning how to paint watercolor flowers with watercolor pencil, you want to have the full range of mark-making possibilities that water can provide.
What Is Special About Watercolor Pencils?
Watercolor pencils are the unique medium that sits in between painting and drawing. What is particularly special about watercolor pencils is that it is a medium that frees someone to combine both paintings and drawing in a single artwork. However, it goes further than that by the way one can use the pencil as a painting medium which can often make unique qualities that can only be found in watercolor pencil drawings. It’s nice to mix pencil marks with painting marks when you want to paint watercolor flowers.
How to Paint Watercolor Flowers With Watercolor Pencils?
The best thing about learning how to paint watercolor flowers with watercolor pencils is that for one, there is a variety of application methods and secondly that comes with both drawing and painting qualities. However, it all starts with a general sketch of the flowers, from there you have free range to either make drawing marks or painting marks. Watercolor flowers with watercolor pencils are quite easy to paint as they are quite abstract in nature. This means the process of painting easy watercolor flowers can be developed through drawing unique marks or painting unique marks which can still resemble the qualities of a flower. This watercolor flower tutorial breaks down a few ways to explore those marks, however, there is no specific way to paint watercolor flowers. It’s all about experimentation.
Source:https://artincontext.org/best-watercolor-pencils/


